My Build Thread
As written on Ford Transit USA Forum
This is not professional advice only an account of what I have done. Knarly Vans LLC will not be held liable for any actions caused by following these accounts. Use this information responsibly and always consult a professional.
My initial van build was a minimal bed that could be removed to replace seats back to stock. The longer I had the van, the more I realized:
- I did not convert it often, as my mattress was heavy and hard to store
- The space underneath the bed was too small and hard to use
- I became more comfortable veering from the idea of returning to stock
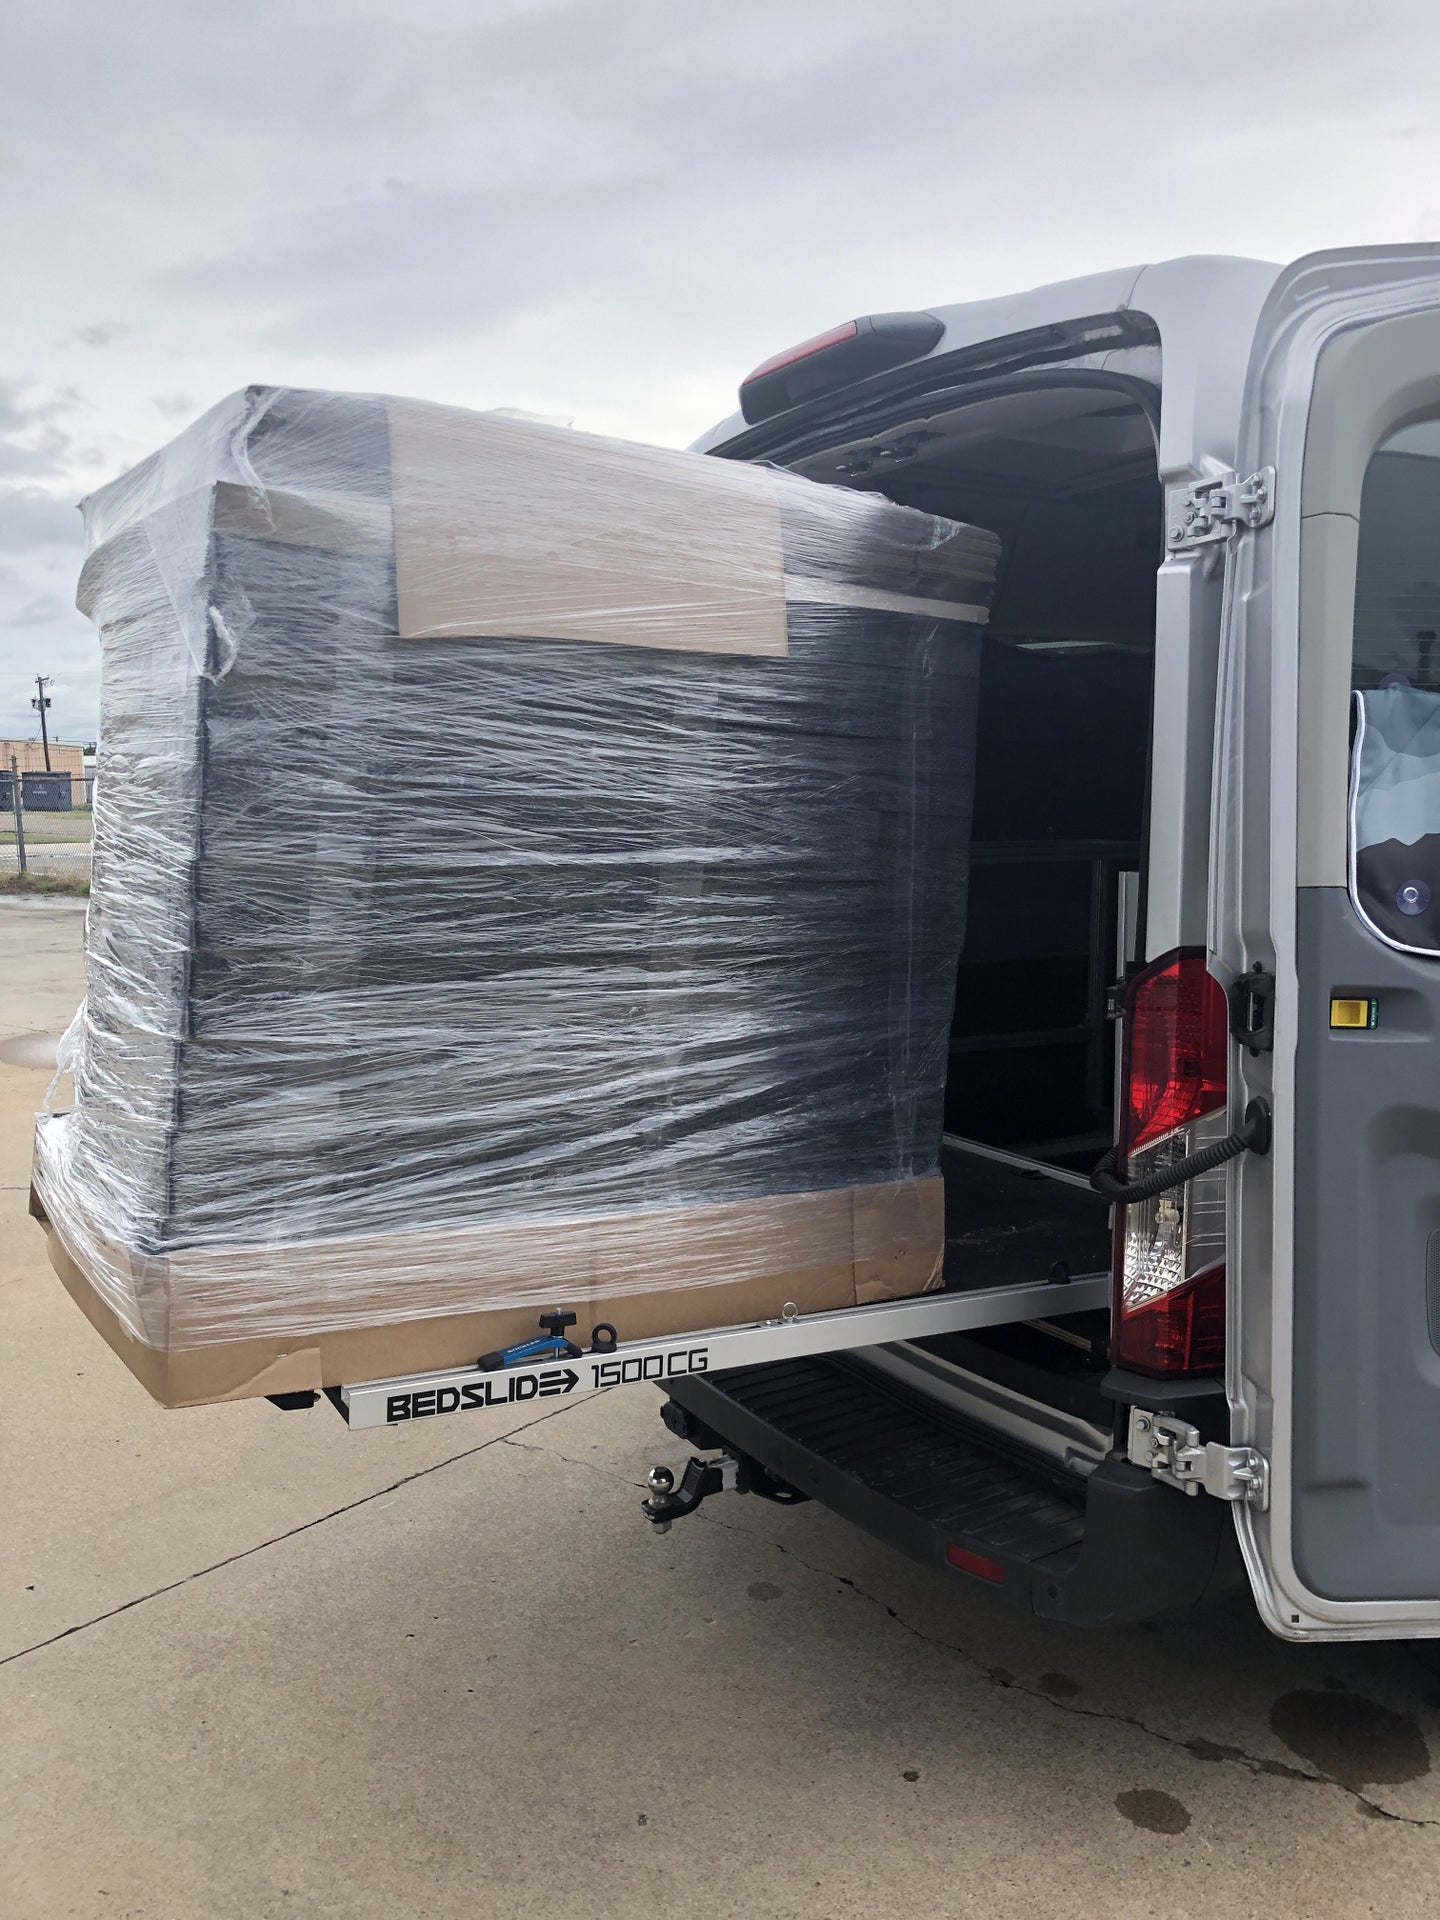
I stumbled upon Vandoit and really liked their builds so modeled my own after theirs. Their LIV model uses a manual hydraulic lift to raise and lower the bed, which I really liked. No need to run power, and additional clearance for bikes when needed. I was also lucky enough to find a bedslide on craigslist that fit perfectly. Their DO model allows for beds to fold out of the way and be reconfigured. I eventually arrived on a combination of the two. I started by modeling the side cabinets and bed base. Using 15 series extrusion, I also mocked it up using 2x2s to verify my CAD. The goal was to order cut to length and tapped so it could be assembled as a kit for my extrusion based passenger van build.

3D cad of my extrusion bed van build

3D CAD of my Ford Transit extrusion passenger van build
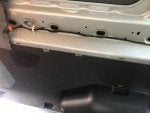
Initially I had planned to run lateral extrusion and U-bolt to the original seat mounts to create mounting points for the bedslide, but changed to using ¾” ply as a cheaper temporary setup. I removed some material and added some kaizen foam in non-structural areas to hide tools or other items.

Ford Transit bedslide storage later modified
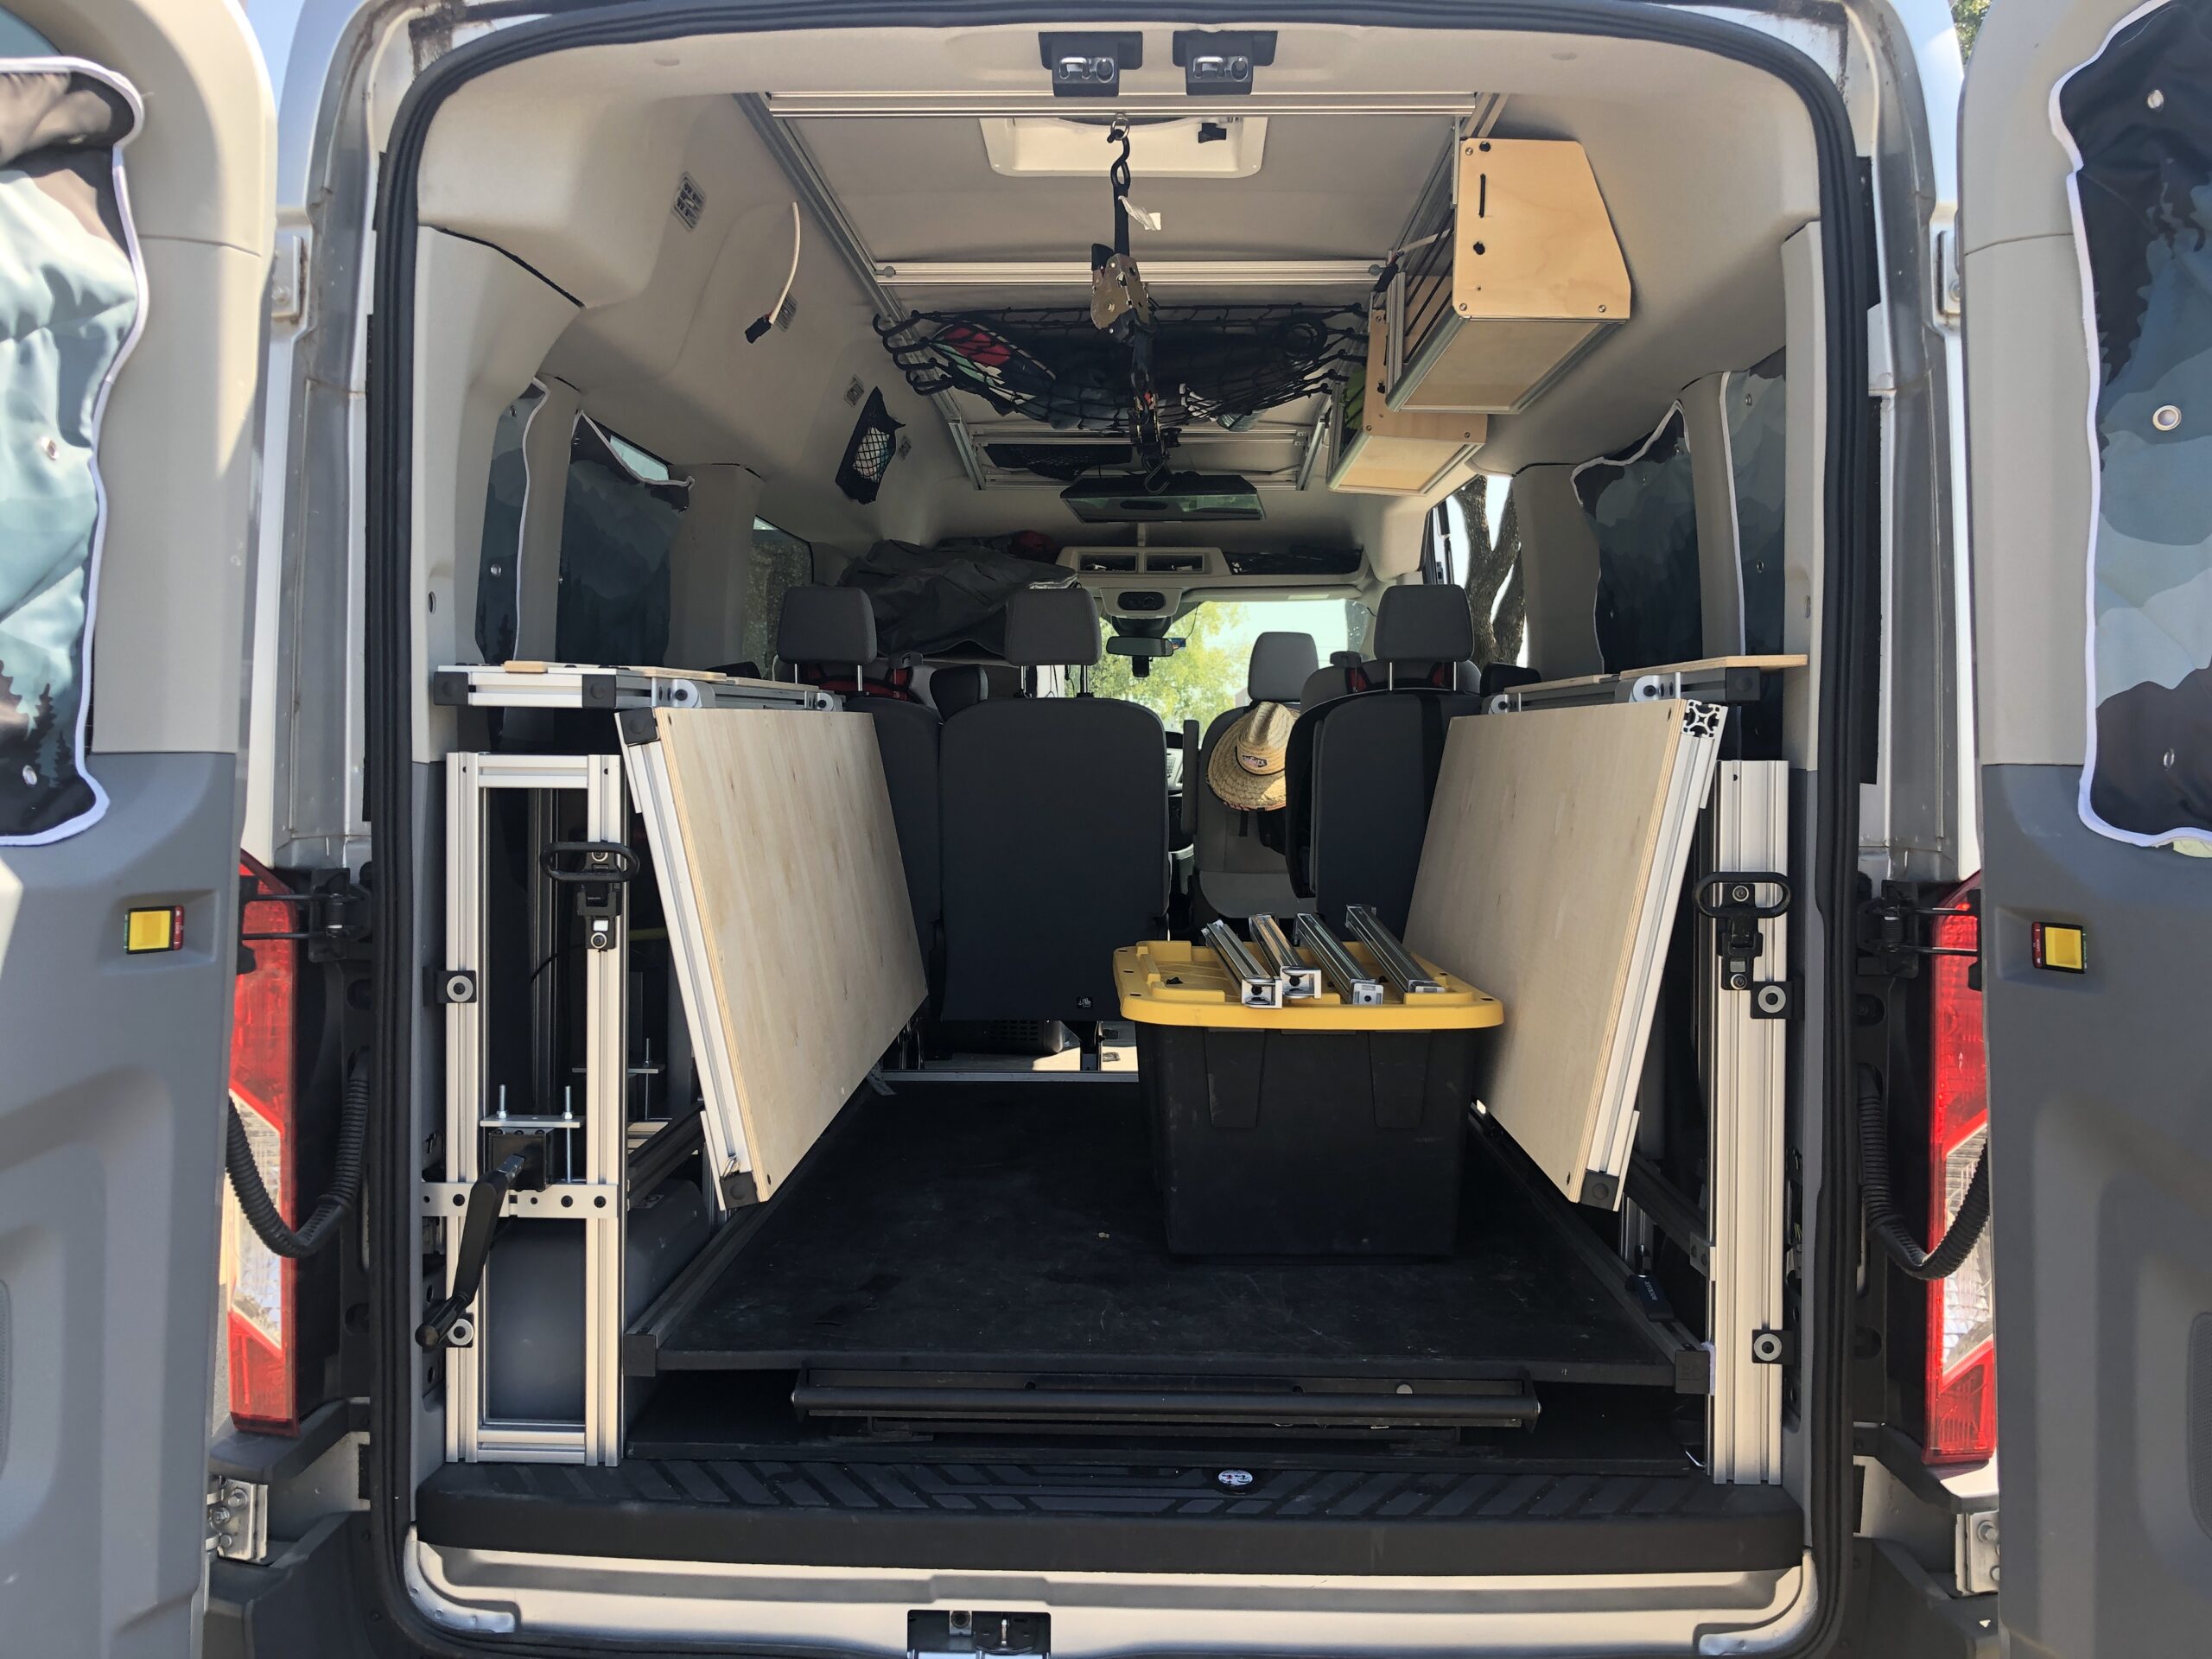
I had a solid bed frame designed but worked on the idea to split it in the middle so each half could fold out of the way which was important to keep it as a daily driver passenger van build. I added an overhead rail with some supports to hold movable/removable shelves, a TV, lights, as well as the bed halves separately.
I replaced my heavy memory foam mattress with two tri-fold cot sized mattresses. I can configure a near-queen E-W, or set-up just half to be a cot size, although I will need to add an extension. There were some dimensions I changed on the fly and will need to adjust to have my halves fold down straighter, they can also fold up when the hydraulics are in the lower position. The intention was to allow the option for the kids to sleep below the bed on the bedslide when needed. When in Queen E-W position the two halves are supported by braces which get stored under the bedslide when not in use. The hydraulic has a 16″ stroke.

Both sides down in Transit Van bed build. Later modified to lower sides

one side of the hydraulic extrusion bed raised in my medium roof ford transit camper van build

both sides raised in the Ford Transit van build
For electrical I used a Goal Zero Yeti 1000 and Trigger six shooter controller.
I reached a usable state and progress slowed. Still to do is finish out the side cabinets for usable storage, finish wiring, probably add some sort of heater, and countless other things. Van builds are always in progress, and the great thing about an extrusion based passenger van build is how often you can modify as needed.
Also added:
- Upgraded jumper seat to quick release
- Replaced carpet with sheet vinyl
- Maxxair
- Thinsulate insulation in ceiling
- Custom Extrusion roof rack
- OVS 270 degree Awning
- Flatline Van Side Ladder
- Passenger side swivel
- B-Pillar Lagun Table
Cheers!
Update

Both sides of passenger van murphy bed raised with under glow LED

Overhead extrusion cabinets Ford Transit
Once all of the roof extrusion rails are in it can be cumbersome to remove them to get under the headliner. I had previously stubbed out some wiring for overhead lights so I wouldn’t have to take it all apart, and I decided to add the lights to the base of my cabinets. I left about 18″ of wire since my shelves can be positioned along the rail, I can move them and still have lights connected. I also have some color changing LED strips that I’m working on the best place for to give some fun lights if the kids sleep underneath on the cargo slide.
Update
I built a frame with some 8020 I had around to secure the dometic fridge and attach it to the floor behind the driver seat. There isn’t a need for the slide in this configuration, so I may build a cabinet around it or readjust the position and do away with the slide. I also replaced the junction box that had my breaker. I found a clear lid, snap one. Based on the GZ Link discussions I wanted an easier way to disconnect the breaker if I wasn’t going to need it charging or would be idling for awhile.


Update
I opted to redo the bedslide mount and used some extrusion attached to the seat rails instead of the wood platform to create a better support structure. I’ll redo my under slide storage with some more kaizen foam and other recovery gear storage.


Update
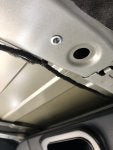
I had never plugged the hole in the headliner from my cargo light after adding the maxxfan in the rear most rib, someone asked me about it a couple weeks ago so I designed a plate to fit it and included a 12v light and switch to connect to the old light wires. Took a few revisions as you end up with the rib right there under the hole which makes fitting a light and a switch a little tight.


Questions on Bed Frame
It’s a manual hydraulic lift that you find on some work benches. Dyna-lift is the manufacturer I believe.
I still used U bolts, I just meant instead of extrusion I used a sheet of plywood. I ran the U bolt under the seat bracket, and then used a piece of aluminum as a bracket to clamp down the plywood.
Thanks! I installed a 1/4-20 rivnut into the roof rib where the gray plastic tree holds the headliner. This hole is in the same location on all the ribs. Then I measured and drilled holes on the extrusion. I’ve thought about offering some plans for the complete build to make it easier for others.
For my needs I decided the 16″ was sufficient, I was able to get mine around $500. Tube length was standard 2×96″ & 2×60″ which was more than enough. I wouldn’t buy their mounting brackets either as they’re ridiculously expensive, although it is an odd mounting spacing you can easily make your own brackets with some aluminum plate or extra 8020 brackets, or try and drill straight through the extrusion. Someone else on here found an electric version with 25″ stroke for around $900 which would be a good option as well.
I used some 2″ square steel tubing, I believe, and cut it into L brackets because I had it on hand. I’ll probably make some aluminum L brackets at some point in the future.
I’m not sure how Vandoit secures theirs. I used some rivnuts that I installed behind the trim just below the window sill in the factory trim, and the D-Ring threaded hole above the wheel well. These were installed for my first bed iteration.
Questions on Ceiling Rails
Thanks!
No just the 2 brackets on each shelf that attach to the visible overhead 80/20.
I really like the OVS awning. I need a step stool to set it up, but it’s held up well in some wind even without the support legs. Provides lots of shade. Setup in 5-10 minutes and same for stowing it. I bought mine from CampSaver which usually has a 20% discount although it took a few months to get from back order.
I installed rivnuts into the ribs where the gray plastic headliner plug typically goes.
Thanks! I installed a 1/4-20 rivnut into the roof rib where the gray plastic tree holds the headliner. This hole is in the same location on all the ribs. Then I measured and drilled holes on the extrusion. I’ve thought about offering some plans for the complete build to make it easier for others.
For my needs I decided the 16″ was sufficient, I was able to get mine around $500. Tube length was standard 2×96″ & 2×60″ which was more than enough. I wouldn’t buy their mounting brackets either as they’re ridiculously expensive, although it is an odd mounting spacing you can easily make your own brackets with some aluminum plate or extra 8020 brackets, or try and drill straight through the extrusion. Someone else on here found an electric version with 25″ stroke for around $900 which would be a good option as well.
There are two ways to do it. I drilled a 1/4″ thru hole, or “access hole”. I then slid the head of the bolt under the ceiling side of the extrusion, slid it to align with the roof hole, and then use your hex screw driver from the underside to tighten through the access hole. This allows the bottom facing T-Track to not have any stop points, but is harder to get the track up…like a real pain by yourself. I used a 2-1/2″ long bolt as it needs to reach the rib before it compresses the headliner foam.
You can also drill a thru hole and counter bore the bottom side for the head of the bolt, and slide the bolt in from the bottom and tighten. I’d probably do this way if I redid it.
I didn’t use a spacer, but you are compressing the foam standoff behind the headliner. The T-Track will be at a slight angle, but the cross supports help to pull it straight. Holes need to be precise to align all the ribs. Let me know if that makes sense.
Best to take your own measurements as these vans can vary, and you’ll have to remove the headliner to install the rivnuts anyways. You’re just measuring center to center on each rib essentially. Note this is more than just the gray tree plug as there are ribs in between.
I used a 94” piece of extrusion for the main length though if that helps, it is a bit too long as it compresses the curve of the headliner in the front and back.
Tnutz is cheaper by far. Make sure you know how to install a rivnut, I had one spin and had to drill it out which was not fun on the ceiling rib. If you’re going to run the rail up to the very front rib above the driver/passenger seat you can order the 40mm dynamic pivot hinge from Tnutz as well. It’s less than half the price of 8020 and the size difference isn’t noticeable from the 15 series extrusion (38mm). The very front rib holes don’t align on the extrusion, they’re narrower, so I used a 90 degree corner bracket and drilled my own holes.
When you install the long rail it will be at an angle like the curve of the roof, the cross member helps pull them together. I used a counterbore and anchor fastener assembly. Dimension needs to be pretty exact for that fastener. I suggest just getting the long rails up before ordering the cross members, measure accounting for them to be pushed square. Mine was 36-13/16″ but I can’t guarantee yours will be the same. I would advise thru-bolting the rail to the ceiling. I just used an access hole with the head of the bolt under the top side t-slot and it was a challenge to get up and align. You will need a longer bolt then you think because you have the space of the headliner and foam before you can thread it in. I think I used a 2-1/2″, but thru bolting would need to be 3-1/2- 4″
I would also plan any above the headliner work before putting it up (wiring/insulation), I’ve probably taken down my headliner 10+ times and it isn’t a big issue but would have been nice to not have to. You definitely want LED strip lights in the extrusion. I like these 5v ones so I wired to 12v with a 12v to USB step down 9.8ft is almost perfect length and the remote works pointed almost anywhere, the kids like it and it’s much better than the puck lights. You can never have enough attachment points up there. Metric eye rings were cheaper for some reason so I ordered these M8 eye rings, with these M8 studs and add some plastic washers so you don’t scratch the extrusion a bunch. Studs are a little long, but they were a better deal on amazon. I think that’s all I can think of, let me know if you have any more questions.
Yes I built the overhead cabinets!
No, I didn’t drill anything. The rivnuts I used fit, or required a light tap with a hammer to make it into the holes.
Interesting, I wonder why the change. I’d recommend a step bit if you’re enlarging them. If you have to drill anyways I’d probably go up to 5/16-18 rivnuts to match the extrusion hardware.
You could probably use an L-bracket. It would have to be custom length if you were coming down through the headliner since you’re compressing all of that as you tighten the extrusion up when you screw through it. Seems like it could be done though. If you removed it though I would hate to hit my head on the brackets hanging down.
I used extrusion because that was going to be the main components of my build. I didn’t really consider L-Track. I think there are more accessories and attachments for the extrusion, I make a bunch of hooks and mounts for example, but L-track seems to work for some people’s builds. Not helpful, sorry.
Questions on Passenger Van
Thanks. No the airbags are still enabled. As long as it’s not built into the window cavity it will allow them to deploy. VDI says their design has been approved by Ford, so I felt comfortable following suit in a similar regard.
Yep agreed, very important to consider airbags as that is one of the main reasons to use a passenger van. Thank you for linking the video. VDI doesn’t have a crash test video that I’m aware of but they are an approved Ford dealer / upfitter, claim Ford has approved their design, and they also sell hundreds of vehicles. I am not them, and have only emulated some of their design aspects and I am not making the same claims. They also have another model that provides a full internal skeleton, that would also allow the airbags to deploy.
The upper shelf is only connected at the front and would be able to move out of the way to provide clearance in the event the airbags deployed. It is not to be a significant weight bearing shelf. I also travel with a cargo net partition separating the passenger area from the back to prevent any further projectiles, and any other items are tied down. In any case when you consider alternatives such as an RV where seatbelts are for decoration I feel confident this is a safer alternative for traveling and camping with my family.
There are other soft sided alternatives to overhead storage such as the Adventure Wagon Mule Bags, or some Duffel bag hacks. On this forum I have seen the fabric/plastic trunk organizers installed vertically as well. I’m not trying to sell anybody on my design choices, only you can make that decision for your comfort, safety, and storage. Cheers!
Congrats on the new van!
Mine is a mid-roof. I use it with only the 3rd row in usually, as it gives lots of room to get the kids in, I put in either the 3 person bench or 2 person in the 2nd row if I have more passengers.
I also use the seat rails for attaching the bedslide, if you have an 8 passenger you won’t have the rails in the back for that attachment so will need to figure out another mounting solution. Edit: actually it looks like the 8 passengers do have the rear rails…
Questions on Cargo Slide
The net stays up full time, almost like a curtain partition. If I go through to the back I’ll unclip it at the eye bolts and walk through. I’m sure it’s not perfect, but I’m hoping it will provide some barrier.
Questions on Flooring
I took out all the seats, heater vents, and then a few trim pieces and just pulled the carpet off of the subfloor. Then used the old carpet as a template and cut the sheet vinyl. The floor was mostly still tacky but added some 3M90 spray and tried to smooth it on.
Questions on Insulation
Yes I used 3M thinsulate everywhere I could under the headliner. Shoved it up above the driver/passenger seats too.
I didn’t put anything on the ribs although I’ve seen some people that have. You could try, although once the thinsulate is compressed it isn’t as effective and may push the headliner down a bit or make it harder to reinstall. If you try it let me know!